
I think baking is one of the most exciting things. When you lose yourself to the moment working your fists into a thick dough or you're struck with inspiration and a new idea turns out really well. Baking is filled with these breathtaking moments: the agonizing ones, when you realize that your expectations didn't align with reality and you're left wondering what to do with an unappetizing tray of cookies; and then the wonderful moments when you open the door of the oven to see, and smell, something more delightful than you could have ever imagined.
Simply taking a bite of a warm, soft, treat, fresh from the oven, can be a magical experience in itself.
For me, a warm, rich croissant is exactly that.
It was a Thursday night, or it might have been a Saturday night, but either way the day didn't matter because I was still off from school, trying to enjoy the final hours of winter break, right down to the very last drop. So I decided I would make croissants - well, pain au chocolat (weez ah french accent.) It seemed fitting, perfect even. When else would I have enough time to complete the long croissant-making process? (I had done my research on the topic.) Just a few nights before, I had been perusing a new cookbook I got for Christmas, and was thrilled to find a recipe for none other than my beloved pain au chocolat. I had a recipe, and plenty of time (not to be confused with thyme): it was fate!
I took out a couple of sticks of butter from the fridge, and scanned my way down the list of ingredients.
Butter
White flour
Salt
Active Dry Yeast
Lard
....lard?!?!
I have nothing against butter, sugar, or any of that other wonderful stuff that makes a pastry a pastry. In fact, I love them all. Eaten sparingly, butter is divine. But there is an extent and, for me, that would be at lard.
And so, the great pain au chocolat plan came to an end.

The Sweeter Side of Amy's Bread is one of my favorite cookbooks, and it's the book I always turn to when I am looking for that perfect recipe.
One of the many things I love about this cookbook is the photos; each one seems as effortless as it is enticing. There is never evidence of that food styling with prim and proper tablecloths and without a crumb or drip in sight. With a spatula in the corner and the glaze dripping onto the countertop the photos seem much more authentic, and honest.
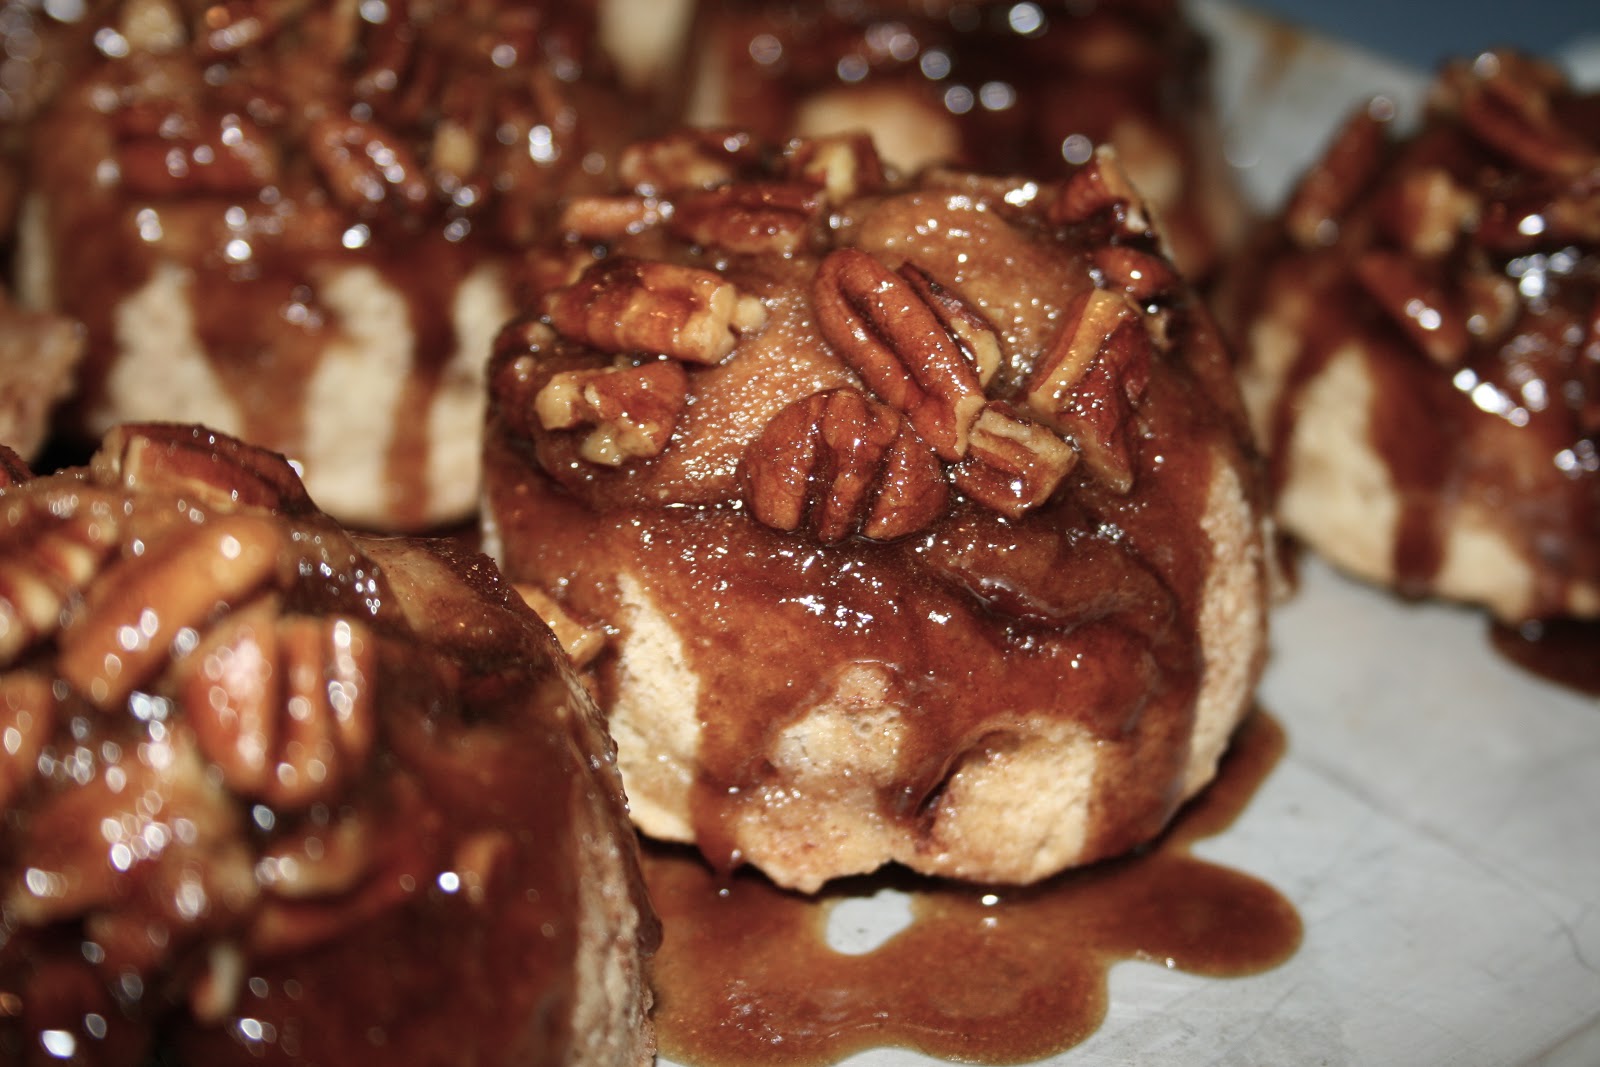
As I flipped through the cookbook searching for my rebound recipe a photo of pecan sticky buns caught my eye, and changing my baking plans wasn't a difficult decision at all.
Pecan Sticky Buns, New Version
makes a dozen buns
1/4 cup very warm water (105° to 115°F)
2 1/4 teaspoons active dry yeast
1 3/4 cups warm water (90°F)
3 tablespoons + 1 1/2 teaspoons unsalted butter, melted
2 cups bread flour
2 cups unbleached all-purpose flour (I used 4 cups of all-purpose whole wheat pastry flour)
1/3 cup sugar
1 tablespoon + 1/2 teaspoon kosher salt
1 1/4 cups dark brown sugar, firmly packed
1/2 cup + 1 tablespoon unsalted butter
1/8 cup dark corn syrup (if you only have light corn syrup, don't fret, you can make dark corn syrup with 3 parts light corn syrup and 1 part molasses)
1 cup pecan pieces, toasted (Note: I ended up using about 3/4 cup pecans, and it ended up being a good ratio for me, but it all depends on how nutty you would like it.)
1/3 cup + 1 tablespoon sugar
1 teaspoon cinnamon
4 tablespoons unsalted butter, softened
Accounting for the time reserved for letting the dough rest, these sticky buns take approximately 4 hours to make.
1. In a large bowl, combine the yeast and the very warm water, and stir until the yeast is dissolved. Let this sit for a few minutes. Add the warm water and the melted butter, and whisk until incorporated.
2. In a separate medium-sized bowl, whisk together the flours, sugar, and salt. Using your hands or a spoon (I found a rubber scrapper worked wonderfully), mix the dry ingredients into the yeast mixture.
3. Move the dough to a lightly floured surface, knead for 5 minutes. Make sure not to knead extra flour into the dough; when it sticks, simply loosen it from the surface using a scraper. The dough should be soft and moist. If it seems too stiff or dry, and you're having trouble kneading it add warm water, a tablespoon at a time, until it softens. Shape the dough, into a loose ball and set it in a lightly oiled bowl. Cover with plastic wrap and let rest for 20 minutes.
4. Gently knead the dough for 1 or 2 more minutes, until it becomes smooth and elastic. Return it to a lightly oiled bowl, turn it so that it becomes coated with oil. Cover the bowl with plastic wrap, and let the dough rest in room temperature until it has double in volume, 1 1/2 to 2 hours. When it is ready, the dough should hold it shape. A finger poked into the dough should leave an indent.
5. While the dough rises, combine the brown sugar, the next measure of butter, and the corn syrup, in a sauce pan over low heat. Stir occasionally, until the butter is completely melted, and the sugar is fully incorporated. Whisk until it becomes silky, and then remove from heat.
6. Grease the muffin pan with butter, then spoon an equal amount of the caramel into the bottom of each of the twelve muffin cups (a little more than two tablespoons). Sprinkle a teaspoon and a half of pecan pieces, or more depending on your preference, over the caramel and press them down slightly.
7. In a small bowl, add the cinnamon and the sugar, and stir until they are mixed evenly.
8. When the dough has doubled in size, take it out of the bowl and set it on a lightly floured surface. Gently pat and stretch the dough to shape it into a 13x10-inch rectangle, with the longer sides facing you. Add flour to your surface if the dough is sticking.
9. Spread the remaining softened butter evenly over the dough, all the way to the edges. Sprinkle the cinnamon sugar mix evenly and generously over the butter. Starting at the bottom edge, roll the dough up. If it sticks to the surface, use a dough scraper or a spatula to lift it. Once you have rolled it into a long log, pinch each end along the edges to seal it. Mark the log of dough to divide into 12 even sections, then use a serrated knife to cut along your marks. Place a section of dough, cut side down, in each of the caramel muffin cups. Let them rise, uncovered, until they have doubled in size (about 60 to 75 minutes).
10. About 20 minutes before baking preheat the oven to 375°F.
11. When they are done rising set the muffin pan on a sheet pan, and bake for 10 minutes. Reduce the temperature to 350°F and bake for 15 to 20 minutes longer, until the tops are golden brown. Make sure the buns have baked completely.
12. Set the muffin pan on a wire rack to cool for a minute. Then in one swift and careful movement, flip the muffin pan upside over the sheet pan so that they fall gently onto the pan. Scrape out any caramel and pecans that stuck to the muffin pan. Store leftover buns in an airtight container, and reheat them an oven heated to 180°F.

So, I literally just read every single post on your blog and can't wait to try so many of your recipes!
ReplyDeleteYou're a wonderful writer and I'm so glad I found this!!
:)